SLA- Lead acid Battery Testing Challenges
Is my battery still good? It is a straight forward question that should have a straight forward answer, but it doesn’t. The State of Health (SoH) of your battery is complicated.
Some take years, but eventually they will all bite the dust. However, there are so many factors in electrical systems that can go wrong, that often times the battery takes the blame for other component’s problems. The easiest and fastest thing to check for problems is the battery. Here is a simple test that can tell you a lot about what is going on inside a battery, and whether it is good or not. This is not meant to test anything other than the battery, but it is a great place to start if you are having electrical problems.
There are three indicators that ideally would be evaluated to determine if the battery is still good:
- Capacity – This is the ability for the battery to store energy
- Internal Resistance – This is the capability of the battery to deliver current
- Self-discharge – This reflects the mechanical integrity and conditions related to the stress of the battery
How to Test a Battery
The best way to test the charge of a battery is a multimeter. This device will give you a good indicator of how high or low a battery charge is.
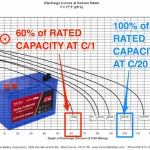
Of the three, capacity is the leading indicator of the state of health for the battery. When new, a battery should deliver 100 percent of its rated capacity. If a battery rated at 5Ah delivers 5 amperes for an hour its capacity is 100 percent. If it delivers 5 amperes for only 30 minutes, then the capacity is 50 percent. But there is no convenient test for capacity without subjecting the battery to charge and discharge cycles. Knowing when to replace a battery then is problematic because of the lack of an accurate state of health test.
In addition, lead acid batteries start out at only about 85 percent capacity when new, and will reach 100 percent capacity as they are used. Once they hit 100 percent, they begin to lose capacity again, further confusing the issue.
The first thing to do is to get a pen, a notebook, a voltmeter, and a battery charger. For this test we will assume that the batteries in question are 12v.
1 Disconnect the battery from the system, remove cables and connectors, and clean off the terminals. Take a voltage reading for reference and make sure to write it down.
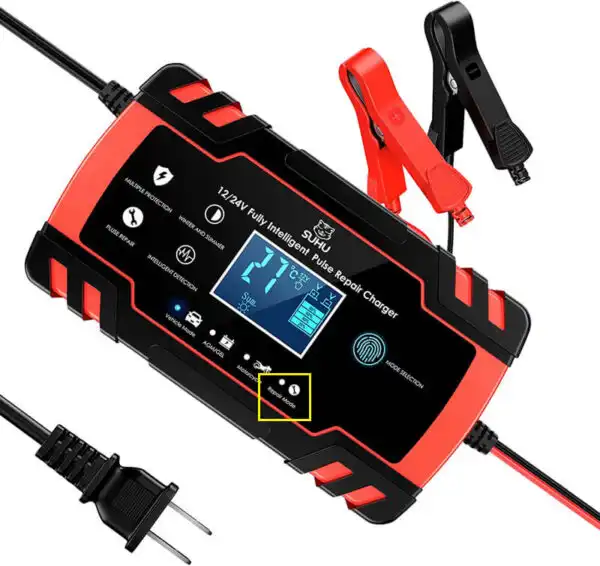
2 Try to charge the battery with the 12 volt charger. Hook it up to the battery charger and let it charge for a full cycle.
Note: If you are using a smart or automatic charger and your Step # 1 voltage reading is below about 6.5 volts, then you will need to hook up the battery in parallel with another battery in order to charge it. You can do this with any other 12 volt battery, including a car battery, using jumper cables, but DO NOT start the engine of the car if you are using one. You don’t need the charger complete its full cycle hooked up to the battery in testing, just give it enough time to add some voltage, usually 10-20 minutes. Then disconnect the second battery, and let the charger charge the battery in question
3 After the charger indicates that the battery is fully charged, or if it has charged for more than 8 hours, disconnect the charger from the battery. Let it sit for 30 minutes and then take another voltage reading.
4 Let the battery sit for 12 hours with no load, DO NOT load test at this time. After the 12 hours take another volt reading. You should be recording the results of each of these readings as you go.
5 Hook the battery back up to the bike, or RV, or whatever you took it out of. If you are testing a starting battery, hold the volt meter on the battery while you attempt to start the motor. Record what the voltage drops to. If you are testing a RV battery, turn on as many electrical devices as you can while the voltmeter is on the battery.
Lead-acid (VRLA) failure modes
▪ Dry-out (Loss-of-Compression)
▪ Plate Sulphation
▪ Soft and Hard Shorts
▪ Post leakage
▪ thermal run-away
▪ Positive grid corrosion
When to Retire a Battery
Lacking a decent test, deciding when to retire a battery needs to be dependent on the application. If a battery is running critical medical equipment or essential military devices, then the batteries will likely be retired before they are near end of life. If the device failure results in danger to life and limb, then the possibility of getting more use out of a battery is not worth the savings.
For some applications, those in charge of the equipment will set parameters for cycle count or date when deciding on when to retire a battery. For an application where a weak battery means the equipment will not function, the battery will be swapped out much earlier than an application that can run as well on a weaker battery as a full capacity one.
Some batteries and portable devices have a fuel gage that shows how much energy remains in the battery. A full charge will show at 100 percent, regardless of the age of the battery. That means that a battery that is fully charged but has dropped in capacity will appear the same to the gage as a full capacity battery, giving a false sense that the device will continue to operate as it has in the past. But these gages show only the state of the charge, and not the capacity left in the battery and the device will stop working more quickly with a diminished capacity battery.
Because SLA batteries are sealed and maintenance free, there is no single test to get the SoH for the battery. If the battery is powering a critical function err on the side of caution and replace the battery early. Maybe the older battery can have a second life in a noncritical machine or vehicle.
The battery can be recycled. It will be taken apart, and its components can be re-used in new batteries, or neutralized and put back into the environment.
SLA Battery Safety Test Items
| Item | Test Method | Check Point |
|---|---|---|
| 1. Shock test (Drop test) |
A fully charged battery is allowed to drop in the upright position from the height of 20cm onto a hard board having a thickness of 10mm or more. Test is repeated three times. |
The battery should be free from noticeable breakage or leaks; and its terminal voltage should be held higher than the nominal voltage. |
| 2. Vibration test | A vibration frequency 1000 times/minute and amplitude 4mm is applied to the X-,Y- and Z- axis directions of a fully charged battery for 60 minutes respectively. |
No battery part should be broken; the battery should be free from leaks; and its terminal voltage should be held higher than the nominal voltage. |
| 3. Oven test | A fully charged battery is left standing in an atmosphere of 70°C for 10 hours. |
The battery case should be not be deformed; the battery should be free from leaks. |
| 4. Cold proof test | A fully charged battery is connected to a resistor equivalent to 60 hour rate discharge and left for 4 days then the battery is left standing in an atmosphere of -30°C for 24 hours. |
No crack should develop in the battery case; the battery should be free from leaks. |
| 5. Heat cycle test | A fully charged battery is exposed to 10 cycles of 2 hours at -40°C and 2 hours at 65°C. |
No crack should develop in the battery case; the battery should be free from leaks. |
| 5. Heat cycle test | A fully charged battery is exposed to 10 cycles of 2 hours at -40°C and 2 hours at 65°C. |
No crack should develop in the battery case; the battery should be free from leaks. |
| 6. Short circuit test | A fully charged battery connected with a small resistor of 10 ohms or less is allowed to discharge. |
The battery must not burn or burst. |
| 7. Large current discharge test | A fully charged battery is allowed to discharge at 3CA to 4.8V/6V battery level. (This test is not applicable to batteries having built-in thermostat.) |
The battery must not burn nor burst, and it should be free from battery case deformation, leaks, and any irregularity in the internal connections. |
| 8. Vent valve test | A fully charged battery is submerged in liquid paraffin in a container, then overcharged at 0.4 CA. |
Release of gas from the vent should be observed. |
| Overcharge test | A fully charged battery is overcharged at 0.1CA for 48 hours, left standing for one hour, and allowed to discharge at 0.05CA to 5.25V/6V battery level. |
No irregularity should be noticed in the battery appearance; the battery should retain 95% or more of the initial capacity. |
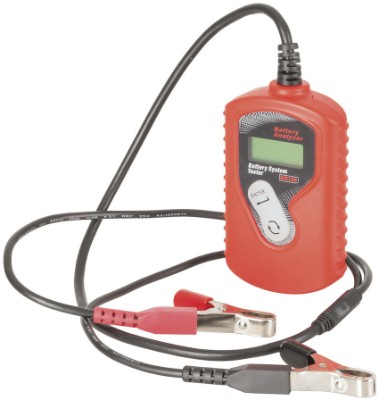
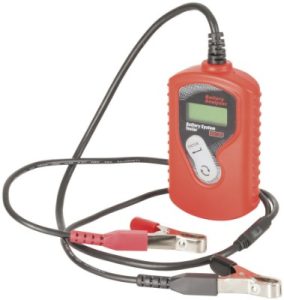
12VDC Lead Acid Battery Tester including SLA, AGM, GEL
Description
This Lead Acid battery tester works on all automotive 12V lead-acid batteries. Suitable for testing various battery types including ordinary lead-acid battery, AGM flat plate battery, AGM spiral battery, and GEL battery, etc. It quickly, easily, and accurately measures the Alternator’s charging and Starter’s cranking conditions.
This 12V Lead Acid Battery Tester can identify batteries with bad cells. With reverse polarity protection design and meets major battery testing standards such as CCA, BCI, CA, MCA, JIS, DIN, IEC, EN, SAE, and GB. Additionally, this battery tester features an LCD display to indicate the results. And what’s more! it has a menu tab, and clips to connect the battery tester to the vehicle’s battery.
Features
- Meets major battery testing standards such as CCA, BCI, CA, MCA, JIS, DIN, IEC, EN, SAE, and GB.
- Identify a battery with bad cells.
- With reverse polarity protection
- LCD display to indicate the results, a menu tab, and clips.
Tag in this article: #Battery
Tips: more detail information, for acid battery。

