How to Refurbish and Repair a Lead Acid Gel Battery
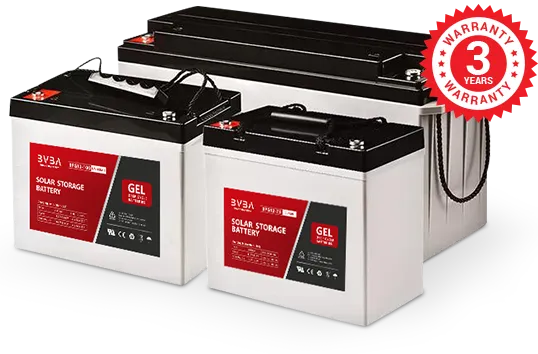
Lead acid gel battery are considered safer than regular fluid-filled lead-acid batteries. Each battery cell contains a thick gel, if the battery gets dropped or damaged and the case splits open, the gel remains in place, whereas a fluid-filled battery would leak dangerous sulfuric acid. Lead-acid gel batteries are sealed units, you can’t access the cells and replenish the electrolyte. It also means they need to be charged and discharged differently from a regular lead-acid battery. If you find you have trouble getting your battery charged properly, try a refurbishment process to repair it.
Step 1
Use whatever energy is left in the lead-acid gel battery. This process helps refurbish the cell structure. If there’s not enough energy to power equipment requiring a lot of energy, turn on lights. Leave the battery to discharge until the lights are very dim.
Step 2
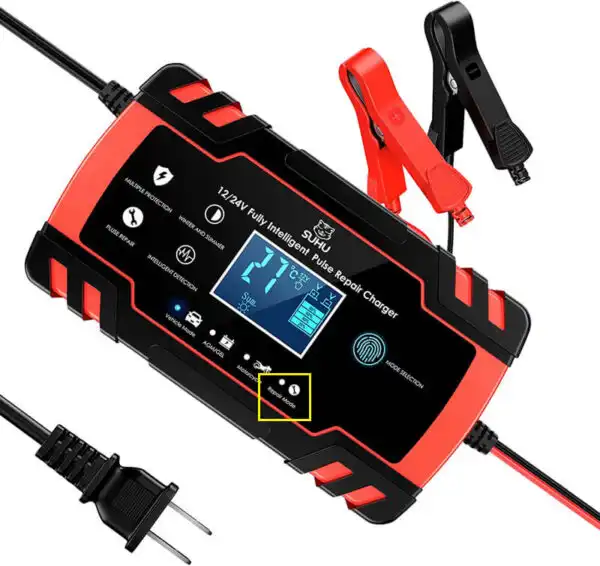
Place your battery charger near your lead-acid gel battery. Check your battery charger for a low charge setting such as “trickle charge.” Some battery chargers have a setting for “Gel.” It’s important the battery receive a slow charge as charging it fast will damage the battery beyond repair. If your battery charger doesn’t have a slow charge rate, obtain or borrow a charger that does.
Step 3
Select the lowest charge setting on the battery charger. Use “Gel” if it has the setting. Connect the two battery cables attached to the charger to the lead-acid gel battery terminals. Use the clamp on the end of the red cable and attach it to the positive “+” terminal of the battery. Use the clamp on the end of the black cable and attach it to the negative “-” terminal of the battery.
Step 4
Turn on your battery charger to begin charging the lead-acid gel battery. The slow charge rate on a totally discharged gel battery allows the cell structures to repair themselves. Leave it for five to six hours and then touch the side of the battery with your hand. If it is charging correctly, the battery is getting warm. Leave it for another five or six hours then touch the battery again and you should find it is warmer, but not hot. If it is hot, turn off the charger immediately and let the battery completely cool before restarting the charge.
Step 5
Turn off the charger after a total of 12 hours. Don’t leave it too much longer, as unlike regular lead-acid batteries you can overcharge a gel battery. Disconnect the battery charger cables.
Use your lead-acid gel battery in the usual way and it should hold a full charge. Repeat the steps at least once or twice a year to prolong the life of a lead-acid gel battery.
How to Fix and Restore Gel Batteries
Gel batteries are generally the same as regular lead-acid batteries you use to start your car, except the battery cells contain a gel rather than a fluid. Gel batteries are considered to be safer, because if the casing gets damaged the gel doesn’t spill, but fluid-based batteries can leak sulfuric acid, if the casing gets damaged. Gel batteries are sealed units, so unlike fluid-based batteries you cannot access the cells. The best way to fix and restore a gel battery is to discharge it as much as possible and then charge the battery slowly.
Step 1
Check your battery is discharged before fixing and restoring it. Turn on your car’s lights and other electrical equipment to use any power in the battery. The lights dim, when the battery is nearly discharged. It’s not necessary to completely discharge the battery. As soon as the lights dim, turn them off and any other electrical equipment you previously turned on.
Step 2
Squeeze the handles of the clamp on the end of the black cable from the battery charger using your hand so the jaws open. Place the open jaws over the gel battery terminal labeled “-” or “Neg” then release the pressure so the jaws close and tighten on the terminal. Repeat the process using the clamp on the end of the red cable from the charger, but position it on the battery terminal labeled “+” or “Pos.”
Step 3
Check the front of your charger to determine what charge settings you can set. It’s important you charge your gel battery at the lowest charge setting. Do not use “Boost” or “Fast-charge,” as you may damage the battery irreparably.
Step 4
Set the charger to the lowest setting; it is usually marked “trickle-charge.” Some chargers have a specific setting for gel batteries, so if you have one, use it. If you don’t have gel or trickle charge settings ensure the charge rate is 20 percent lower than the voltage output from the gel battery. The voltage is clearly labeled on the battery and is usually 12-volts. Using 12-volts as an example, you need to charge your battery at 10-volts or less.
Step 5
Plug in your battery charger to the electricity supply. Turn on your charger and then let your battery charge. Feel the side of the battery after 6 hours. If it is warm, that’s fine, so continue charging, but if it feels hot, turn off the charger and let the battery cool for about 30 minutes. Then turn on the charger again.
Continue to charge the battery, but check it every six hours to ensure it doesn’t get too hot. After 24 hours, your gel battery is fixed, restored and fully charged, so turn off the charger. Disconnect the two clamps on the battery terminals.
How to Test Gel Batteries
A gel-cell battery is different than most traditional batteries in that it is sealed and does not utilize liquid electrolytes. Rather, silica is added to the electrolytes, causing it thicken into a gel that is suspended within the battery. Because of this, gel batteries are spill-proof and more resistant to corrosion. Gel batteries, however, are generally more expensive than traditional batteries and are not able to be refilled. This also means gel batteries cannot be tested with a hydrometer. The simplest and quickest way to test your gel battery is with a digital voltmeter.
Step 1
Access the gel-cell battery by removing the terminal covers. Then disconnect the battery from the vehicle. Detach the gel battery’s negative terminal first, followed by its positive terminal. For most vehicles, you will need assorted box wrenches in order to completely disconnect the battery.
Step 2
Attach the voltmeter’s tester leads/clamps to the gel battery. The negative tester lead must connect to the battery’s negative post and the positive tester lead to the positive post.
Step 3
Turn on the voltmeter and look at the reading shown. If your gel battery displays a charge within the 12.85 to 12.95 range, it is 100 percent charged. A voltage of 12.65 means it is only 75 percent charged, while a 12.35 reading correlates to a 50 percent charge.
Step 4
Recharge the gel battery if you receive a low voltage reading. Be sure that you use a voltage-limited battery charger, also known as a float charger, for this task. A traditional charger should not be used on gel batteries, as it may overcharge and damage the battery. A voltage-limited charger will charge at a set rate and turn off when a full charge is achieved.
Permit the gel battery to sit for 24 hours after charging. This will allow the surface charge to dissipate and provide a more accurate reading. Retest the gel battery with a voltmeter after the 24-hour period has passed. If your gel-cell battery shows a low charge once again, chances are it will need replaced.
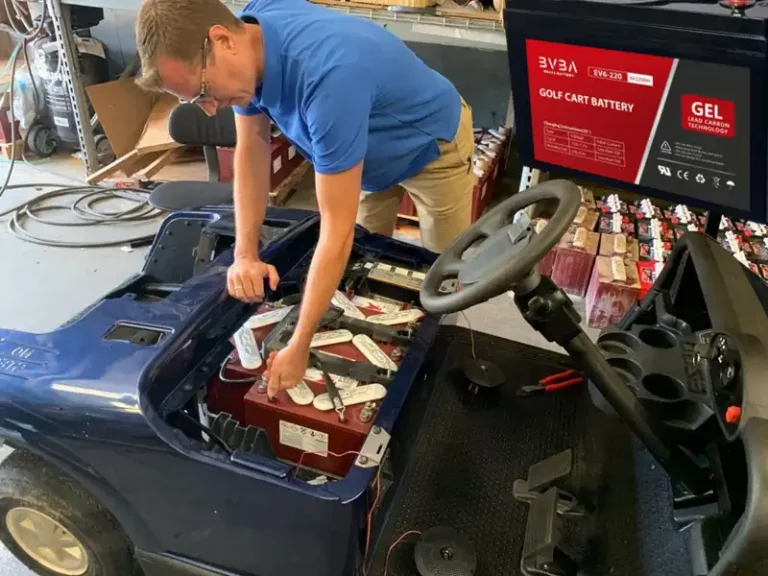
How to Refurbish a Golf Cart Battery
Most golf carts are equipped with 6-volt lead-acid batteries, which are small versions of car batteries. However, batteries in golf carts often don’t last as long as they could because of neglect and improper storage. You can do several things to make a golf cart battery last longer, including reconditioning the batteries. You also can reduce problems by making sure all electrical devices on the cart are turned off when it is not in use.
Step 1
Use a charger designed for lead-acid batteries that has the capability of automatically switching to low (trickle) charge when the battery is fully charged. A low-power 6-volt solar battery charger also works well. Charge the battery whenever it may be depleted or won’t be used for several days or weeks.
Step 2
Remove a golf cart battery to charge it, using a crescent wrench to loosen the battery cables. Use a mixture of water and baking soda to clean any deposits around the battery terminals and cables. If it is not a sealed battery, remove the cell caps and top them off with distilled water. Do not use tap water because it contains chemicals that will damage the battery and shorten its life. Turn the charger off while you connect the power leads (make sure positive is connected to positive and negative to negative). Set the charger according to manufacturer’s instructions and turn it on. When charging is complete, turn the charger off, remove the battery, and reinstall it in the golf cart unless you are going to store it.
Step 3
Store a golf cart battery properly. Although lead-acid batteries hold a charge well, they will drain if they sit on a shelf long enough, resulting in a deep discharge. You can leave the golf cart battery connected to a regular charger set on trickle charge or use a small solar-power charger. If using a trickle charger isn’t feasible, charge the battery every couple of weeks.
Recondition lead-acid golf cart batteries to extend their useful life. Even with proper maintenance, the lead plates in a golf cart battery may become sulfated. This is relatively easy to remedy. Remove the battery as you would to charge it. Before charging, drain the fluid from the battery and replace it with a mixture of 12 percent to 15 percent magnesium sulfate (Epsom salts) and distilled water. Then recharge the battery. It should resume normal function, though you may have to recharge it a couple of times to bring it back to full storage capacity. Note that because the lead pates can suffer damage from the sulfation, reconditioning a battery won’t work more than a few times.
How to Charge a 6V Battery
Charging a 6-volt battery is no different than charging other voltage batteries, but you do need to ensure that you are using the correct charger. For example, a 6-volt lead-acid battery, such as the type sometimes used in marine vessels or RVs, needs to be charged using a suitable lead-acid charger. A nickel or lithium-based battery, such as those used to power cordless tools, must be charged using a charger designed for the correct chemical base.
Step 1
Ascertain the chemical base of the 6-volt battery. It is clearly labeled on the battery and will say LA or SLA if it’s a lead-acid battery, NiCd or NiMH if it’s a nickel battery, or Li-Ion if it’s a lithium battery. Make sure you have the correct charger for the type of battery you need to charge.
Step 2
Attach the battery cable clamp on the end of the red wire from the charger onto the “+” terminal of the battery and the cable clamp on the end of the black wire from the charger onto the “-” terminal of the battery, if your 6-volt battery is lead-acid.
Step 3
Insert your battery into the charger, if the 6-volt battery is nickel or lithium-based. Simply insert the battery into the charger compartment, ensuring you match the “+” and “-” terminal on the battery to the corresponding “+” and “-” terminals on the charger.
Step 4
Set the charger to charge at 6 volts, if it has a variable charge feature. This applies to both a lead-acid charger and a nickel or lithium charger. Charging at a higher rate can damage your battery and may be dangerous. Charging at a lower rate doesn’t cause any damage, but it will take considerably longer for your battery to charge.
Step 5
Turn on your charger. Make sure the charge light indicator illuminates to confirm charging is in process.
Step 6
Leave the battery to charge. The charge light turns off or changes color once your nickel or lithium-based battery is fully charged. However, lead-acid battery chargers continue to charge until you turn them off. You can expect to charge a 6-volt lead-acid battery in a couple of hours using the normal charge setting. If you use a boost charge, then an hour is usually fine; but if you use a trickle charge, leave your battery to charge for about 6 to 12 hours and then turn off the charger.
Remove the battery from the charger, if your battery is nickel or lithium-based. Remove the cable clamps attached to the two battery terminals, if your battery is lead-acid.
How to Renew a Car Battery
Modern car batteries are reliable and long-lasting. When they cease to work properly, it is usually due to sulfation. Sulfation occurs when the lead electrodes in the battery become coated with sulfur from the sulfuric acid electrolyte. The primary cause of sulfation is repeated deep discharges (running the battery down). There are several methods for reversing sulfation, provided the sulfur hasn’t corroded the lead plates too badly. The simplest and least expensive requires only a common household chemical and a good quality “smart” charger designed for use with car batteries.
Step 1
Use a crescent wrench to loosen the battery cables and remove the battery from the car. Work in a well ventilated area and always wear gloves and safety glasses when working with lead acid batteries. Keep open flames away from the work area.
Step 2
Remove the cell caps located on top of the battery. If it’s a sealed battery, locate the entry points (called shadow caps) marked on top of the battery and use a drill to punch through them. Drain the battery fluid into anon-metallic container.
Step 3
Mix a solution of 15 percent to 20 percent by weight of magnesium sulfate (better known as Epsom salts) and water–about 7 oz. of Epsom salts to 1 qt. of water). Use distilled water since tap water sometimes contains chemicals harmful to batteries. When the Epsom salts are completely dissolved, fill each cell of the battery with the solution.
Step 4
Charge the battery using a 3-phase “smart” charger set to 12 volts. These chargers are designed to provide optimum charging with an initial “bulk” charge followed by a slower absorption charge and finally a trickle or “float” charge. Make sure the charger is turned off and follow manufacturer’s instructions for connecting the battery to the charger. Turn the charger on and allow the battery to charge overnight.
Step 5
Turn the charger off and disconnect the battery. Replace the cell caps. Use plastic plugs to fill the shadow plug holes in a sealed battery. Finally, reinstall the battery in the car. Make sure the battery cables are securely fastened.
Complete the renewal process by removing the battery and bring it to full charge using the battery charger once a week for two or three weeks.
How to Trickle Charge a Car Battery
The lead-acid batteries found in cars and other motor vehicles provide a high current when called upon and are recharged by the car’s alternator during operation. When not in use, car batteries slowly lose their charge. Most of the loss is from self-discharge inherent in the battery’s chemistry, which may be as much as 2 percent of the battery’s capacity daily. A trickle charger keeps the charge topped up by delivering a small, constant current during storage or periods of disuse.
Step 1
Open the battery’s vent caps to check the electrolyte level in each cell. Add distilled water to the bring the level up to the bottom of the fill hole if necessary. If your battery doesn’t have removable vent caps, it is maintenance-free and you should skip this step.
Step 2
Use a trickle charger that matches your battery’s voltage output. Most cars use 12-volt batteries, but check the battery label or your vehicle’s owner’s manual to be sure.
Step 3
Attach the charger’s clamps directly to the battery terminals if the charger has alligator-style clips. Clamp the charger’s red (positive) cable to the battery’s positive or “+” terminal and the black (negative) cable to the battery’s negative or “-” terminal.
Step 4
Plug the AC adapter into a 110-volt receptacle and turn on the power switch. If your charger uses a solar panel to provide current, put it where it will be exposed to light for most of the day.
Leave the trickle charger connected while the battery is not in use to keep the battery’s charge topped up.
How to Fix a Dead Motorcycle Battery
Motorcycle batteries are six-volt lead acid batteries, small versions of the12-volt batteries used in automobiles. If you have a dead motorcycle battery that won’t accept a charge, the problem is normally sulfation. This occurs when a lead acid battery is deeply discharged, causing sulfur from the battery acid to adhere to the lead plates inside the battery and block the flow of electric current. The sulfur also corrodes the lead plates, but as long as the corrosion isn’t severe, you can fix a dead motorcycle battery without spending a lot of money.
Step 1
Take the proper safety precautions. A motorcycle battery contains sulfuric acid, which is extremely toxic. Wear goggles and gloves and work only in a well ventilated area. Keep open flames away from the battery and always allow the battery to cool to room temperature before working on it.
Step 2
Remove the battery from the motorcycle. You’ll probably need to use a small crescent wrench to loosen the battery connectors. Remove the small plastic caps on the top of the battery (called cell caps) and drain the battery fluid completely.
Step 3
Prepare a solution of 8 ounces of Epsom salts (magnesium sulfate) and one quart of distilled water (it’s much easier to dissolve the Epsom salts if you heat the water first to about 130-degrees Fahrenheit). Never use tap water in a battery because it contains chemicals that may damage the battery. Use a plastic funnel to fill each cell of the battery with the solution. Once each cell is filled, shake the battery gently to make sure the solution is well distributed inside the battery.
Step 4
Place the battery on a six-volt trickle charger or a charger with a slow charge option. Do not use a regular charge rate as you would for an automobile battery. Motorcycle batteries are much smaller, and a powerful charging current will damage them and can produce flammable gases. Start with the battery charger off and hook the positive lead to the positive terminal and negative to negative. Leave the cell caps off during charging.
Turn the charger on low the battery to charge overnight or until the charger indicator says charging is complete. Then turn the charger off, remove the Leeds, and replace the cell caps. Reinstall the battery in the motorcycle, making sure the connectors are secure. The battery should now operate normally.
How to Charge a Sealed Acid Battery
Low maintenance or “sealed” lead acid batteries are widely used in cars and other vehicles like ATVs and golf carts. However, these batteries can be completely drained on occasion and must be recharged. The process is similar to that used for the older types of lead acid batteries (those that have removable caps on top for each battery cell). You do need to use a good charger and follow specific procedures to charge sealed lead acid battery, both for safety and to avoid damaging the battery.
Step 1
Remove the battery from the vehicle to charge it. Charging a fully discharged lead acid battery off of a car alternator can result in an overcharge and may damage the battery. Use a crescent wrench to loosen the battery cables. Always wear safety goggles and protective gloves when working with lead acid batteries, even the sealed type. The sulfuric acid in the battery is extremely corrosive.
Step 2
Use a three-stage battery charger. This type of charger is designed for lead acid batteries and usually costs about $40-60 (as of 2009). Plug the charger into regular house current but leave it turned off. A sealed lead acid battery is equipped with a small tube called a vent tube to permit gases inside the battery to escape. Make sure it is free of obstructions. Connect the positive lead to the positive battery terminal and negative to negative.
Step 3
Set the charging voltage. A voltage of 2.40-2.45 volts per cell will give you maximum charging speed. A slightly lower voltage (2.30-2.35 volts per cell) will take somewhat longer, but will help to make the battery last longer. Once the voltage is set, turn the charger on. Allow about 5 hours for the initial charging stage, which will bring the battery to about 70 percent charge. The charger will automatically switch to a lower voltage topping stage, which may take up to 10 hours (the time may be longer for high power storage batteries). Once the battery is fully charged, the charger will go to the low voltage “float” phase (also called trickle charging).
Reinstall the battery or place it on a trickle charger for long-term storage. To reinstall the battery, turn off the battery charger, and then disconnect the power leads. Return the battery to the vehicle and reconnect the power cables, making sure positive goes to positive and negative to negative. If you don’t plan to use the battery for several weeks (if it’s in a recreational vehicle you are storing for the winter, for example) leave it on trickle charge or recharge it every couple of weeks to prevent natural discharge from draining the battery.
What is the Difference Between a Float Charger & a Trickle Charger?
Both float and trickle chargers are devices that slowly emit low-voltage charges to your car battery, restoring the battery to a fully charged status over several hours. Subtle differences between the two devices determine which charger is best for you.
Float Chargers
Float chargers are equipped with electronics that allow the device to cycle on and off. This is beneficial if you are going to have the charger connected to the battery for a long period. The device automatically turns off when the battery is fully charged and turns on again when the battery’s charge lowers.
Trickle Chargers
Trickle chargers work similarly to float chargers. You connect the trickle charger to the battery terminal and a slow, steady stream of low-voltage electricity recharges the battery. Trickle chargers, however, do not come with the on/off feature of the float charger. Electricity continues to flow to your battery until you remove the trickle charger.
Considerations
A trickle charger is most effective when you are available to turn it off after the battery has charged. Overcharging your battery can cause permanent damage. If you are not available to monitor the charging process, or if your vehicle is in storage for a long period, a float charge that automatically turns itself off and on is your best option. However, if cost is a concern for you, trickle chargers are significantly less expensive.
How to Rebuild 12 Volt Lead-Acid Batteries
The idea way to maintain a 12-volt lead-acid battery in good condition is to regularly discharge it by about 70 percent and then charge it up slowly. However, you know that’s not a practical option as you need your car battery everyday and it gets a small discharge then gets recharged every time you use your car. Under normal circumstances you don’t think about your 12-volt car battery from one month to the next; until you find it’s not taking a charge and goes dead. Before you decide to get a replacement, or simply put it on charge, have a go at rebuilding the cell structure of your lead-acid battery.
Step 1
Wear protective gloves and goggles before you rebuild the cell structure of your 12- volt battery. You need to access the cell reservoirs that contain highly toxic sulfuric acid that immediately burns on contact with skin.
Step 2
Place your 12-volt lead-acid battery in a battery tray on a stable work surface. Remove the six battery cell caps on top of the battery. Either unscrew the caps using your fingers, or if the caps have slots, use a screwdriver. Each cell produces 2 volts and is linked in series to produce 12 volts. Put the caps to one side.
Step 3
Check the fluid level inside the six cells. It’s likely you find the fluid level is below the minimum mark on the inside of the cells. This means the process of the electrons flowing from one lead plate to the other inside the cell has stopped. The fluid, called electrolyte, is sulfuric acid and enables a chemical reaction to take place between the positive and negative plates when the battery gets a flow of electricity from the car’s alternator or battery charger. If the fluid level drops below the minimum marker, the plates would be exposed, and they would corrode over time.
Step 4
Rebuild the chemical cell structure by replacing the fluid. Use distilled water and top each cell up to the maximum marker inside the cell. It’s important that you don’t overfill the cell as during the charging process the cells get warm and the fluid expands. The distilled water will mix with any existing sulfuric acid in the cell and start to rebuild the chemical structure. However, for the process to begin the battery needs electrons to flow between the plates created by a small electric current from a battery charger.
Step 5
Replace the cell caps using your fingers or a screwdriver. Don’t over-tighten.
Step 6
Put the spring clamp on the end of the black battery charger cable onto the negative battery terminal. It’s clearly labeled “Neg,” “-” or may have a black plastic ring around the terminal pole. Put the spring clamp on the end of the red battery charger cable onto the other battery terminal. It’s clearly labeled “Pos,” “+” or may have a red plastic ring around the terminal pole.
Step 7
Set your battery on the lowest setting possible; often called “trickle charge.” Rebuilding the chemical structure inside the cells takes time and it’s important the process is done slowly so the distilled water gets more acidic. As acidity increases so electron flow increases between the lead plates. Any corrosion on the plates caused by lack of electrolyte dissipates rebuilding the structure.
Step 8
Plug in your battery charger and turn it on. Check the setting again to make certain it’s on the lowest possible. Leave the 12-volt lead-acid battery to charge slowly for 36 hours. During this time, the energy retention of the plates increases as chemical activity changes. You can check if the rebuilding process is working by touching the side of the battery after about 12 hours. You would find it’s getting warm indicating that the battery is taking a charge.
Turn off the battery charger after about 36 hours. Disconnect the battery cable clamps from the battery terminals. Place your hand on the side of the 12-volt lead-acid battery, and you find it’s fairly warm to the touch meaning the chemical cell structure is rebuilt, and your battery has retained a charge.
How to Rebuild a Golf Cart Battery
A golf cart battery, also called a deep-cycle battery, is a 12-volt battery with six 2-volt cells. A deep-cycle battery contains lead acid. When a deep-cycle battery sits for long periods of time in bad weather, damage occurs. When you purchase a new battery, pour additive into the terminals, which prolongs the life of the battery and readies it for reconditioning in the future. Every battery comes with a guaranteed lifespan; however, the level of maintenance determines whether it reaches its full lifespan potential.
Step 1
Dress in complete safety attire with goggles, rubber gloves and a rubber apron.
Step 2
Work next to a continuous water source because a lot of water is required. Water helps dilute the acid of the battery; work in a well-ventilated area.
Step 3
Take the terminal cables off the battery and remove them from the golf cart. Set the battery on a work bench.
Step 4
Pry off the cell caps on the battery. Depending on the amount of corrosion, you may need a screwdriver to help you pry off the cell caps.
Step 5
Turn the water source on and empty the contents of the battery into a container that is not made of metal. Make sure you have your safety gear on properly. Rinse out the battery cells with running water, pouring the water into the container.
Step 6
Mix Epsom Salt and distilled water together in another container. The ratio of this mixture is 7 ounces of Epsom Salt to 1 quart distilled water. Use distilled water because it is free of minerals that cause corrosion in batteries. Stir the mixture, completely dissolving the Epsom Salt.
Step 7
Pour the Epsom Salt into the battery cells, making sure each cell has the same amount of liquid.
Step 8
Hook a three-phase charger to the golf cart battery. Leave the rebuilt battery charging overnight.
Step 9
Take the rebuilt battery and put it back into the golf cart, reconnecting the battery terminals.
Start the golf cart and use for one week. At the end of one week reattach the golf cart battery to the three-phase battery charger and leave until a complete charge is accepted.
How to Repair a 12 Volt Battery That Was Boiled Dry
It’s likely that a 12 volt battery that’s boiled dry is a flooded-cell, lead-acid battery that’s fitted in vehicles. It contains six individual cells that each produce two volts and the cells contain lead-plates completely covered in electrolyte fluid — if the battery is in good condition. A battery that’s boiled dry, due to being exposed to excessive heat, won’t contain any fluid and sulfation may have formed on the lead plates. It may be possible to repair the battery, depending on the level of sulfation that’s formed.
Step 1
Remove the six plastic cell caps from the top of the battery. Use a screwdriver, or twist them off using your fingers.
Step 2
Check the plates for sulfation. Look inside each individual cell. If the plates are completely covered in sulfur deposits, so much that you can’t see the plates, then there’s little you can do and a replacement battery needs to be purchased. However, if there’s only partial sulfur deposits and smallish crystals and parts of the plates are visible, then it’s certainly worth attempting a repair.
Step 3
Pour distilled water into each cell carefully. Fill the cells up to the maximum marker that’s on the internal wall of each cell. Don’t overfill. Leave the battery for five minutes and then check the fluid level again, since you will find they need topping up. Leave off the cell covers for the moment.
Step 4
Connect your battery charger to the battery terminals. The red clamp connects to the “+” terminal and the black clamp connects to the “-” terminal.
Step 5
Select the lowest charge setting you can on your battery charger; it’s probably called “trickle charge.” It’s imperative you charge your battery slowly and for a long time to successfully repair it. For the sulfation to disperse, the distilled water you poured in the cells has to change into electrolyte, which is actually sulfuric acid. Because your battery had boiled dry, there was no fluid in the cells so the cells currently contain pure distilled water.
Step 6
Turn on your battery charger and leave it to charge your battery for 12 hours. After 12 hours, take a look in the cells and feel the side of the battery, but don’t turn off the charger. The battery casing is getting warm and small bubbles are beginning to rise in each cell, if the repair process is working. If the battery casing is completely cool and no bubbles are rising, there’s little point in continuing as your battery isn’t taking a charge. You need to get a replacement.
Step 7
Let the battery charge continuously for an additional 12 to 18 hours. This may seem like a long time, but it’s necessary to complete the repair. Now that you have seen bubbles rising, you know the repair is likely to work.
Step 8
Turn off the charger. Remove the clamps from the battery terminals. Have a quick look in the cells — bubbles are rising rapidly. Most, if not all, of the sulfur deposits have dispersed. The side of the battery is also fairly warm, so you can be confident that your battery is repaired.
Replace the plastic cells caps. Screw then on using your fingers and then tighten them using a screwdriver, if appropriate.
How to Charge a Car Battery Indoors
According to Happy Living, a car battery should be recharged if it has been in storage for a long period of time, if it has been accidentally drained or if the battery is aging and simply needs a boost back to heath. Indoor charging is not much different from charging the battery outdoors; however, take precautions when charging a battery indoors as sparks can easily ignite if battery recharging is done improperly.
Step 1
Wear safety glasses. Protect your eyes from possible diluted sulfuric acid solution that can spark in reaction to the battery’s flammable hydrogen gas.
Step 2
Place the battery charger on a concrete, flat surface away from flammable materials and wood. Use the charger in a garage or basement where it is away from household furnishings.
Step 3
Place the volt setting of the battery charger on 12 volts and choose a low amp setting that will charge the battery slowly. Slowly charging the car battery will desulfate the crystallization of lead sulphates, providing a higher amperage output return.
Step 4
Select the correct battery-type setting on the charger if applicable. Most modern car batteries use a conventional/low-maintenance battery. Use a compatible AWG gauge extension cord if necessary to reach the garage electrical outlet.
Step 5
Apply the red positive alligator clip to the positive terminal end of the battery first. Place the black negative alligator clip onto the non-painted metal bracket. Activate the charger. Allow the battery to charge for six to eight hours. Never charge the battery over 8 hours (unless directed by battery-charger manual), as it can damage the internal components.
Test the battery’s voltage with a voltmeter and set its dials on the 0-50 V range. Disconnect the battery charger from the battery. Connect the voltmeter’s positive red lead to the battery’s positive terminal. Connect the black lead to the negative terminal. Check the voltage level; if the battery has a range of 12.6 to 12.8, the battery is charged. Keep charging the battery if it has a voltage under10 V.
How to Know If a Deep Cycle Battery Is Bad
Deep cycle batteries are well suited for marine, RV, solar power and similar applications. They are different from your average car battery, and they must be maintained and checked regularly to get the best performance from the battery and the system to which they are connected. Part of this maintenance is the testing of deep cycle batteries to see if they are in need of replacement.
Step 1
Do a visual inspection of the battery. If there is any damage to the battery case or terminals, the battery should be replaced. Check the electrolyte level and make sure that the battery plates are covered.
Step 2
Charge the battery fully before testing. Remove any surface charge to the battery by putting it to use in its application for a few minutes.
Step 3
Have a copy of the manufacturer’s specifications for the battery nearby, as you will need to refer to them as you test the battery.
Step 4
Take a hydrometer reading of all the cells in the battery. This is as simple as squeezing the bulb and releasing it so that it sucks up some electrolyte, and then reading the specific gravity measurement. Refer to the spec sheet for the minimum acceptable reading and difference of specific gravity between cells.
Step 5
Take a voltage reading with the voltmeter and compare it to the manufacturer specs for a fully charged battery.
Follow the instructions for the digital load tester, and test the battery while it is being placed under a load. This type of tester will not necessarily measure the battery capacity, but it will indicate whether or not the battery has an interior defect. A battery that fails any of the tests with these methods will need to be replaced.
How to Diagnose a Scooter Charging System
To get the best performance from your scooter, you must allow it to receive a full charge. Several things can interfere with the charging of a scooter, including a loose or improper connection, a disruption in power or a faulty battery. You must troubleshoot the charging system of the scooter to identify and resolve any problems.
Step 1
Turn the ignition key to the “Off” position. Locate the battery. Depending on the make and model of your scooter, you may find the battery under the seat or under a panel on the floorboard.
Step 2
Plug the battery charger into an electrical outlet. Connect the battery charger’s red wire to the positive (+) battery terminal. Connect the black lead wire to the negative (-) terminal. If you connect the charger to the battery incorrectly, the scooter will not receive a charge.
Step 3
Examine two indicator lights on the charger. A green indicator shows the battery charging; a solid red light shows the charger receiving power. A dim or flashing red light indicates an disruption in power. Press the “Reset” button to restore power to the charger.
Replace a battery that does not hold a charge. After one year of use, a battery may become defective, warns Pride Mobility.
What Causes a Car Battery to Overcharge?
Battery overcharging is a common problem in vehicles today. Overcharging your battery can significantly decrease its lifespan, make it more difficult for it to turn over, lower its efficiency, and in extreme cases, can even lead to battery explosion. Overcharging is a problem that can be difficult to notice. Amateur car enthusiasts sometimes misunderstand correct battery care, or don’t understand the problems a battery can experience. Battery overcharging is easy and cheap to avoid.
Faulty Voltage Regulator
A car’s battery will overcharge if the voltage regulator isn’t working correctly. A voltage regulator is usually part of the alternator, and is used to keep a steady flow of voltage to the battery. If the voltage regulator is defective, it will send either too little or too much charge to the battery. If it sends too much, the car battery will overcharge. The voltage regulator is easily replaceable at an easily affordable price, sometimes for as little as twenty dollars, as of 2009.
Faulty Alternator
Sometimes the alternator itself can be at fault. The alternator is the device that converts the mechanical power of the engine into electrical power to charge the battery. When an alternator breaks, it usually stops creating electricity for the battery, which will then eventually die. However, if the wrong alternator is placed in the car, or if the alternator is running at the wrong pace, it will create too much energy for the car battery, causing it to overcharge. The alternator is another easily replaced part.
Incorrect Charger Use
If a battery charger is used to charge your battery outside of your car, improper use of the charger can result in overcharging. If a battery is placed on the charger too long, it can result in overcharging, and a significant decrease in your battery’s lifespan and efficiency. This is why it is important to read about your specific battery and understand how long it needs to charge to be effective. Too much charge will lead to problems.
Faulty Battery Chargers
Sometimes chargers can be faulty. Their settings may be wired incorrectly, or the charges labeled incorrectly. As a result, your battery may be getting overcharged, even if you are carefully monitoring your charging. This is a problem that is hard to avoid, as manufacturing mistakes can happen anywhere, anytime without warning. It is a good idea to test your charger regularly to see if it is running correctly.
Heat
Extreme heat in the summer can also have an adverse effect on the car battery. If the battery has been previously overcharged, extreme heat can increase the problems caused by overcharging, and exacerbate any other problems with the battery. This problem can be hard to avoid if you live in a warm climate. The only real way to ensure safety against this problem is to avoid overcharge in the first place.
How to Recondition Lead-Acid Batteries
Lead-acid batteries are wet cell batteries. Each cell contains two slightly different lead plates, and the plates sit in electrolyte fluid, which contains sulfuric acid. If the electrolyte level gets too low, the lead plates are exposed and sulfation — the deposit of a hard lead-sulfate compound on the lead electrodes of the battery — occurs. This restricts the flow of electrons from one plate to the other and the battery cell is unable to retain a charge. If you find your battery doesn’t have the power to start your vehicle or isn’t charging correctly, try reconditioning the lead-acid battery before getting a replacement.
Step 1
Wear a pair of lightweight rubber gloves to protect your hands before attempting to recondition your battery. The fluid in the lead-acid battery cells burns if it gets on your skin.
Step 2
Remove the caps on the top of the lead-acid battery. If the caps have slots in them, use a fairly large flat-head screwdriver to unscrew them, and then lift off the caps, using your fingers. Many cell caps simply screw in place, so you can remove them in this manner.
Step 3
Check the fluid level in the cells. If the fluid level is below the minimum marker on the wall of the cell, it means the lead plates may be exposed, and sulfation may have occurred.
Step 4
Use distilled water, not tap water, and top up all the cells to the maximum marker. Don’t go past the maximum marker, because the fluid expands while the lead-acid battery charges.
Step 5
Leave the caps off the battery, and attach the two clamps on the ends of the red and black battery cables of the battery charger to the “+” and “-” terminal poles respectively on your lead-acid battery. Squeeze the clamp handles to open the jaws of the clamps, and then place the clamps over the terminal poles and release the pressure so the jaws of the clamps close securely.
Step 6
Plug your charger into the power supply. Select a slow charge; a fast charge won’t satisfactorily recondition your battery cells.
Step 7
Turn on your battery charger. To make sure it’s charging, check to see if the charging light is on, or check the charge display panel, if there is one.
Step 8
Allow your battery to charge slowly for at least 24 hours; 36 hours are better, if you have the time. During this time the cell will start to recondition and turn the distilled water into sulfuric acid. The acid will remove the sulfation from the lead plates, and the electrons will start to flow from one plate to the other and take a charge.
Step 9
Turn off your battery charger after 24 hours to 36 hours. Remove the plug from the power supply, and remove the clamps from the terminal poles on the lead-acid battery.
Replace the caps. Screw them in place using your fingers and then tighten them with a screwdriver, if they have slotted tops.
How to Remove Sulfation From Batteries
Sulfation can happen to the lead plates contained in wet cell batteries, commonly known as lead-acid batteries, which are fitted in most vehicles. When sulfation occurs, your battery goes dead. Sulfation is a result of the electrolyte fluid level in the wet cells falling below the top of the lead plates, exposing them. The lead plates are unable to retain electrical energy because the electrons can’t flow between the two plates in each cell. Lead plates can’t be scrubbed clean, but you can remove sulfation by reconditioning your battery.
Step 1
Remove the plastic covers from the top of the battery cells. There are either three or six covers, depending on whether your battery is a 6-volt or 12-volt battery respectively. Unscrew the knurled covers using your fingers. If the covers have screwdriver slots, then place a screwdriver into the slots and unscrew them.
Step 2
Look inside the battery cells. You may need to use a flashlight to see. Look for the two markers on the walls in each battery cell. The mark nearest the top indicates the maximum fluid level, while the lower mark is the minimum. Sulfation occurs after the fluid drops below the minimum level. You can see sulfation on the plates, which looks similar to corrosion on metal, but is yellowish in color due to the sulfuric acid contained in the cells.
Step 3
Trickle distilled water carefully into each cell. Fill the cells up to the maximum marker, but not above. You need to allow space for the fluid to expand, which takes place when a battery charges. Don’t replace the covers on the battery cells.
Step 4
Place the clamp on the end of the red positive battery cable from the battery charger onto the positive battery terminal. It’s usually labeled “+”, or “Pos.” Place the clamp on the end of the black battery cable onto the negative battery terminal labeled “-” or “Neg.”
Step 5
Set your battery charger to the lowest voltage charge setting. It may be called “trickle charge.” Don’t select a fast or boost charge as high charge settings will not properly remove sulfation from the lead plates.
Step 6
Plug your charger into the power supply. Turn on your charger. Check that you have an illuminated light, which confirms that the battery is charging. If it has a meter, check that it’s registering a low charge.
Step 7
Leave your battery to slow charge for 36 hours. As the battery charges, the distilled water you put into the cells will change into sulfuric acid. The acid will gradually remove the sulfation on the lead plates.
Step 8
Check the battery after 12 hours. Look into the cells. You should see small bubbles rising, which confirm that the cells are charging. If you put your hand on the wall of the battery, you will find that it’s warm. If one or more cells are not producing small bubbles, it’s possible the cell is damaged beyond repair; but wait until the end of the charging time.
Step 9
Look into the cells after 36 hours. Check to see if bubbles are rising to the surface in each cell. There should be a lot of bubbles rising because the battery is fully charged and the sulfation is removed from the lead plates. If there are no bubbles present in any of the cells, it’s likely the cell is dead. Replace the battery, as even one dead cell affects the performance of the battery.
Turn off the charger. Remove the two clamps from the battery terminals. Replace the covers on the cells by screwing them in place using your fingers or a screwdriver.
Golf Cart Batteries Related Products:
EV12-155(12V155Ah) GOLF CART BATTERY
EV6-220(6V220Ah) Electric Vehicle GEL Battery
EV8-170(8V170Ah) Golf trolleys GEL Battery
Related Products Application:
Golf Cart Batteries Related Posts:
8 Things You Need to know for Golf Cart Batteries
How to Maintenance Your Golf Cart Battery?
How to Make Your Golf Cart Batteries Last Longer?
Golf Cart Batteries: Best Batteries for Your Golf Cart
Tags: Golf Cart Batteries.

